Friday, November 28, 2014

Orange Trifle

orange trifle


Things required :


1 stem glass
Orange Sponge Cake (for the recipe click here)
Whipped Cream
Fresh Orange Segments (peeled and deseeded)

Procedure

1. Cut the sponge into 1 inch cubes and place a few of them at the bottom of the glass.
2. Pipe out a generous amount of whipping cream over it to form a layer.
3. Layer the chunks of fresh orange over it.
4. Pipe out whipping cream to make a new layer.
5. Place the cake cubes carefully to make a new layer.
6. Again pipe out whipping cream to form a layer.
7. Lastly place the orange chunks to make the top-most layer.
8. Chill it for atleast 2 hours before serving.

Tips : You can use a readymade sponge cake to keep the procedure simpler.

Variation :  Strawberry Trifle. For the recipe, click here.


Orange Sponge Cake (Eggless)

Orange Sponge Cake (Eggless)

tastes best when chilled!!

Preparation time : 15 min
Baking time : 30-45 min
Serves - 10 people

Ingredients :

Maida - 2 cups
Condensed Milk - 1 tin
Mirinda/Fanta Cold drink - 180 ml
Butter (white) - 6 tbsp (or 90 gm)
Soda-bi-carb - 1/2 tsp
Baking Powder - 1 tsp

Procedure :

1. Whisk condensed milk and butter together.
2. Add soda-bi-carb and baking powder to maida and sieve thrice.
3. Start with adding 2 tbsp of maida mixture into the condensed milk-butter mixture. Mix it thoroughly. Again add 2 tbsp of maida mixture. Mix. Keep on repeating the procedure till everything is completely mixed. When the batter gets thick while mixing, add cold drink too.
5. Pour the batter in a greased and dusted baking tin.
6. Bake it in a preheated oven for 35 min at 180 degree.
7. Check the cake by inserting a tooth-pick in the centre of the cake. If it comes out clean, that means cake is done, If not, bake it for 10 min more.

Serving Suggestion : Top it with whipped cream and fresh orange segments (peeled and deseeded)

Variation : For Chocolate Cake - Add 1 tbsp of cocoa powder to the maida mixture in step 2 and instead of mirinda/fanta use pepsi/coke.


Monday, November 24, 2014

Tomato & Basil Paneer Roll (for kids)

This recipe is a wholesome meal in itself. A very appetizing, tasty and savoury roll, loved by all. Its a perfect recipe for sunday brunch or for tea-time. Loaded with cheese and paneer definitely its a heartfull meal specially for 'fussy kids'. Give this to your child to hold in her fist and just watch how quickly she finishes all of it by herself (without you prompting her again n again to have a bite  :P)


Things Required :


things required for the roll

Cheese cube - 1/2
Pizza topping or Tomato Ketchup
Dough for 1 Lachcha Paratha
1 onion and 1 tomato

Procedure :

1. Cook 1 Lachcha Paratha with the dough and place it in a serving plate.


2. Spread a generous layer of tomato ketchup or pizza topping over it.


3. Spread the layer of paneer bhurji over it.


4. Sprinkle chopped onion and tomato over it.
  
5. Sprinkle grated cheese.
6. Roll it tightly.


7. Wrap it in aluminium foil and serve immediately with tomato ketchup.


Thursday, November 20, 2014

Tomato and Basil Paneer Bhurji (low fat & quick)

Tomato basil paneer bhurji


Preparation time - 10 min
Cooking time - 10 min
Serves - 2

Ingredients :

Oil - 1 tsp
Onion (finely chopped) - 1/2 cup
Tomato (finely chopped) - 1/2 cup
Salt to taste
Red Chilli powder - 1/2 tsp
Paneer (crumbled) - 1 cup  (I used the homemade low fat paneer!)
Dry basil - 1/4 tsp
Fresh basil leaves (finely chopped) - 1 tbsp

Procedure :

1. Heat oil in a non-stick pan. Saute onions till golden-brown.
2. Add tomatoes, salt and red chilli powder. Mix. Cook till tomatoes get soft.
3. Add crumbled paneer and dry basil. Mix. Slower down the flame.Cook covered for 3-4 minutes, till paneer absorbs the flavour of basil and tomato.
4. Transfer the preparation in a serving bowl and garnish with basil leaves.

Saturday, October 11, 2014

Rasedar Aloo Tamatar (Pressure Cooker)

Rasedar aloo tamatar (Quick)


This sabji is usually children's favourite.

At my home, its like my last-minute saviour. when i dont want to spend much time in kitchen, i opt for this sabji.

Usually people don't use kasoori methi in this sabji but adding it gives this sabji a feeling and taste of 'poori wali aloo ki sabji'.

Serves - 4
Cooking time - 13 min
Preparation time - 5 min

Ingredients :

Potatoes (peeled, diced and washed) - 4 cups
Tomato - 4 (it should yield 1 1/2 cup puree)
Water - 3 cups
Oil- 1 tbsp
Cumin Seeds (Jeera) - 1 tsp
Asafoetida (Hing) - a pinch
Turmeric Powder (Haldi) - 3/4 tsp
Coriander Powder (dhaniya powder) - 1 tsp
Red Chilli Powder - 1/2 tsp
Kasoori Methi - 1 1/2 tsp
Salt - to taste

Procedure - 

  1. Heat oil in a pressure cooker.
  2. Crackle the cumon seeds and asafoetida.
  3. Add all the spices.
  4. Add fresh tomato puree.
  5. Let it cook for 3-4 min on medium flame.
  6. Add potatoes and water.
  7. Close the lid properly.
  8. Wait for first whistle and slow down the heat to lowest.
  9. After 8 min, turn off the flame.
  10. Open the pressure cooker and mash some of the potato pieces with the back of a spoon. (This makes the gravy thick) 
  11. Garnish with coriander (optional)
  12. Rasedar aloo tamatar is ready to serve. 

Thursday, October 9, 2014

Lauki Ka Halwa (Low fat)

Lauki Ka Halwa (Low fat)

Made up of bottle-gourd and milk, this dessert is a traditional dish of North India. Many people also call it 'Ghiya ki Lauz' or 'Lauki ki lauz'.
It is very easy to prepare, even beginners can make it with perfection, though cooking time is a bit long.
Lauki ki barfi is also prepared the same way, the only difference is that the final product of barfi is drier than halwa. I find halwa tastier than barfi.. may be because of its juicy, wet texture.
This dessert can be served warm or cold, both ways it tastes ultimately delicious!!
Tip -  If anyone in your family doesnt like bottlegourd, then instead of green colour, put red colour and tell them its gajar ka halwa.. no-one will get to know 

Lauki Ka Halwa (Low fat)


Preparation time - 15 min
Cooking time - 45 min
Makes - 6 servings

Ingredients - 

Bottlegourd (Lauki/Doodhi) - 500 gm
Toned Milk - 1 Litre
Sugar - 1 cup
Cardamom Powder - 1/2 tsp
Green Colour - 5-6 drops

Procedure -

  1. Peel and grate bottlegourd.
  2. In a deep, heavy bottom pan, heat milk. Bring it to boil. Lower the flame. Let the milk reduce for 10 min.
  3. Add grated bottle gourd and cardamom powder.
  4. Cook till the mixture gets thick, stirring occasionally. Make sure your spatula reaches the bottom of the pan while stirring, otherwise the food content may stick to the bottom and get butrnt, spoiling the whole recipe.
  5. Add sugar and green colour, mix thoroghly.
  6. Cook till all the liquid evaporates.
  7. Serve hot or cold.
  8. Refrigerate when it has cooled down completely.
Tip - 
  1. Garnish with dry-fruits or nuts like raisins, almonds and cashew nuts.
  2. If making for kids, use full-fat milk.
  3. Rose water can also be used as a flavouring agent instead of cardamom. Add it in the last.


Wednesday, October 8, 2014

Capsicum Stir-fry (Quick recipe)

capsicum stir-fry (quick recipe)


This sabji is prepared using very little spices. Everytime i make this dish, i get amazed by its taste and texture. I get delighted by the feeling that how can so simple ingredients result in such a relishing dish. Aloo-simla mirch is common in indian cuisine, this time when you buy capsicum, try this recipe and trust me you wont be disappointed.


capsicum stir-fry


Preparation time - 5 min
Cooking time - 10 min

Ingredients -

Capsicum (diced into 1" cubes) - 1 1/2  cups
Onion  (diced into 1" cubes) -  1 cup
Tomatoes (pureed) - 1/2 cup [2 tomatoes pureed in a mixer]
Tomatoes (cut into 1" cubes) - 1/2 cup
Tomato ketchup - 1 tbsp
Oil - 1 tsp
Red Chilli powder - 1/4 tsp
Sugar - 1 tsp
Salt to taste

Procedure - 

  1. Heat oil in a non-stick pan.
  2. Saute onions till translucent pink.
  3. Add capsicum, pureed tomatoes, salt, red chilli powder and sugar. Cook till capsicum is tender but should not loose its crunch.
  4. Add tomato ketchup. Mix well. Taste and adjust the seasoning, if required.
  5. Turn off the flame then add tomato cubes.
  6. Leave the pan uncovered for 10 min, as covering it with a lid will further soften the capsicum to spoil its crunchiness.
  7. Capsicum stir-fry is ready to serve!
capsicum stir-fry

Tips -
  • If you like spicy food, you can add 1 tsp chilli sauce in addition to tomato ketchup.
  • Paneer cubes, if added, gives an exotic appeal to this recipe.


Tuesday, October 7, 2014

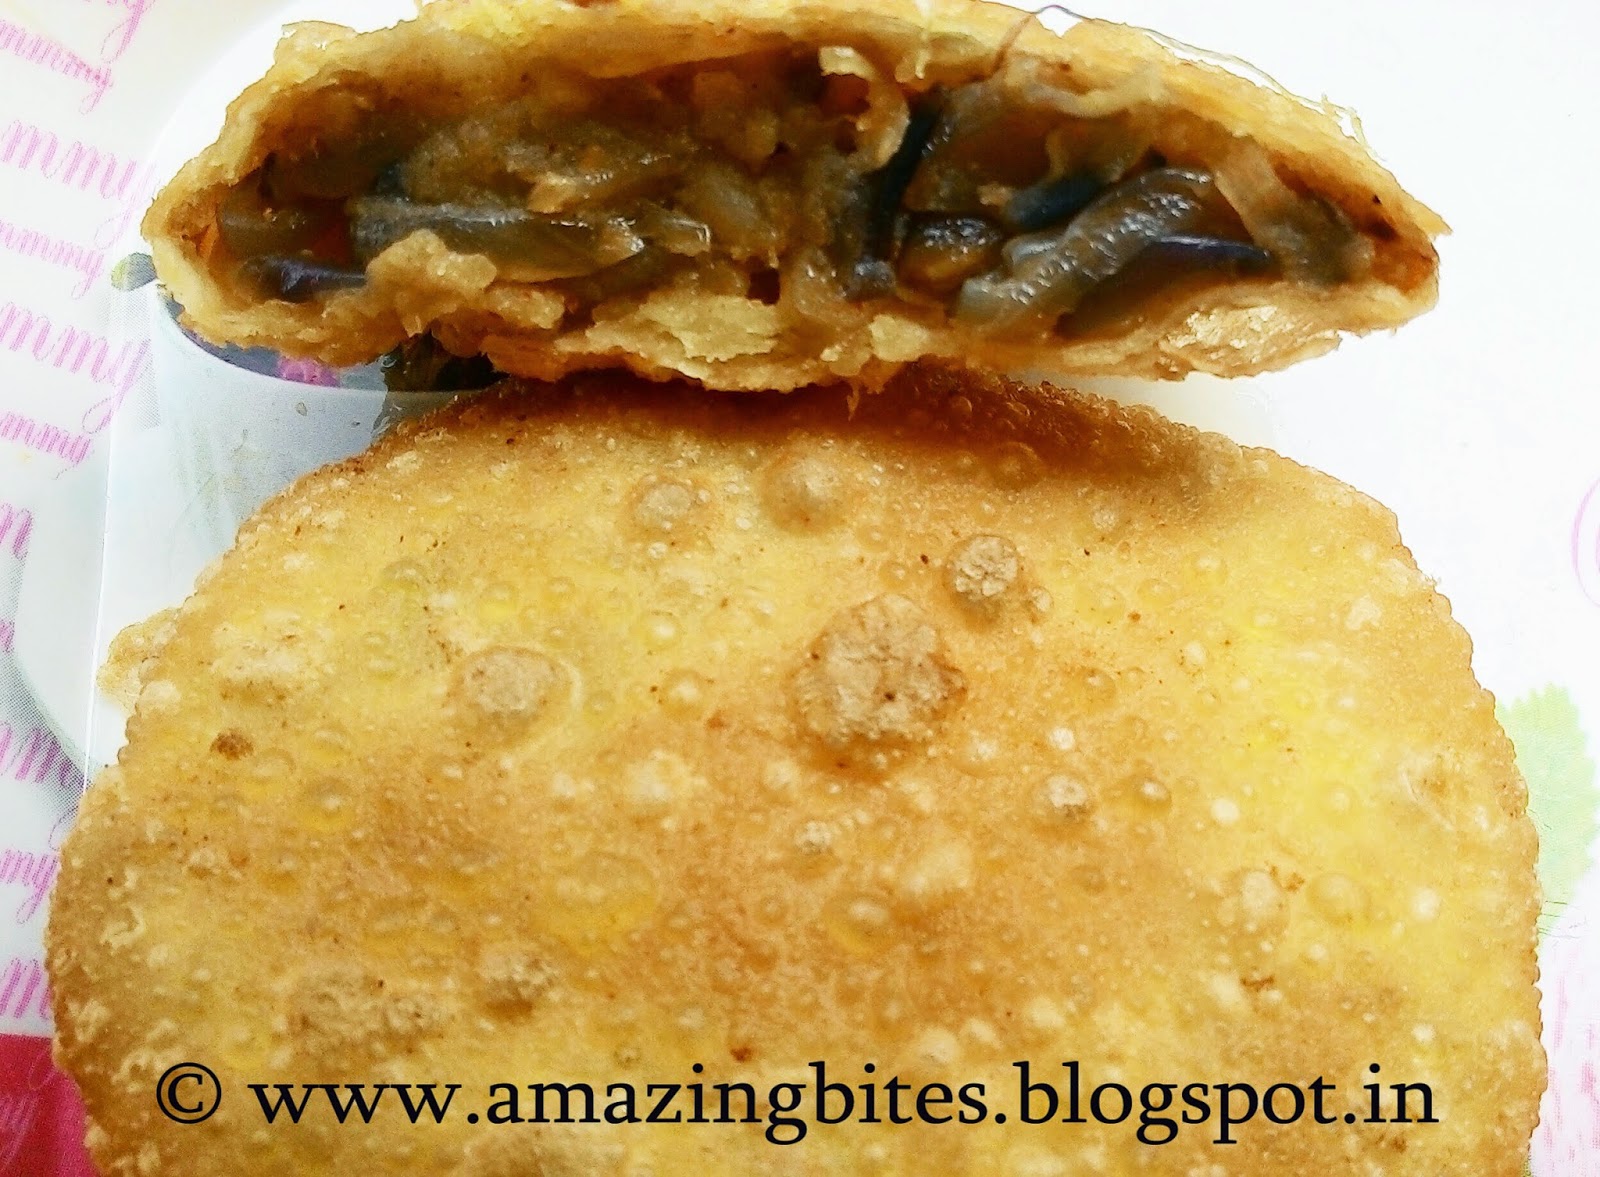
Pyaz kachori

pyaz kachori


Makes - 12 kachoris

Ingredients :

For the dough -

Maida (All purpose flour) - 2 cups
Refined oil - 1/4 cup
Salt - 1 tsp

For the onion filling -

Onions (thinly sliced) - 3 cups
Potatoes (boiled, peeled and mashed) - 1-1/4 cup
Cumin Seeds (Jeera) - 1 tsp
Corriander (dhaniya) powder - 1/2 tsp
Fennel (saunf) powder - 1/2 tsp
Red Chili powder - 1/4 tsp
Chat Masala - 1/2 tsp
Salt to taste
Oil - 1 tbsp

Oil to deep fry

Procedure -
1. Sieve Maida. Put salt and pour oil over maida and rub the flour between your palms to mix the oil into the maida. Use water to make a soft dough. Knead for 2 min. Cover the dough with an inverted bowl and keep aside.

making pyaz kachori
2. Heat oil in a non-stick pan.
3. Crackle the cumin seeds.
4. Saute onions till translucent pink.

making pyaz kachori

5. Turn off the flame.
6. Add rest of the ingredients. Mix very well. Filling looks like like the pic below.

making pyaz kachori

7. Divide the filling and dough into 12 equal portions.
8. Using a little dry all purpose flour (maida), roll out one ball of maida-dough into a thin circle like we roll out a thin chapati.
9. Place one portion of filling in the centre of chapati.

making pyaz kachori

10. Lift the edges of the chapati and fold them towards centre over the filling.
11. Seal the edges thoroughly. Make sure, there are no crevices while folding.

making pyaz kachori

12. Again roll it out 2-3 times using a very little pressure (otherwise the filling will peep out) to get the shape and size of a kachori.
13. Repeat steps 8 to 12 to make 11 more kachoris.
14. Heat oil on high flame in a deep kadhai and then on sim flame deep fry the kachoris. Turn the kachori upside down after every 3-4 min. Each kachori takes about 15 min to get golden-brown and crisp.

making pyaz kachori

15. Serve immediately. 


making pyaz kachori


Tip : You can prepare the kachoris before hand and re-heat on a low convection mode at the time of serving.

Tuesday, September 30, 2014

Tutti Frutti Cake (Microwave & Eggless)


tutti frutti cake

This cake is an all-time favorite dish for all the age groups. You can prepare it on any ocassion without giving any second thought.

The tutty-fruity on the icing was so eye-catching and attractive that my three-year old daughter didnt want the cake to be cut :) Another snap-shot of the cake is :

tutty fruity cake

 Ingredients -

Maida (all purpose flour) –  2 cups
Sugar – 1 cup
Butter – 1 cup
Baking Powder – ½ tsp
Soda-bi-carb – ½ tsp
Honey – 2 tsp
Curd – 2 tsp
Milk – 1 cup
Vanilla Essence – 1 tsp
Green color – 5-6 drops
Tutti - Frutti (red & green) – 2 tbsp

Icing –

Whipped cream – 4 cups
Tutty – Fruity – 2 tbsp
Soaking Syrup ( 2 tsp powder sugar dissolved completely in 1/2 cup water)

Procedure –
  • Mix and sieve the maida, soda bicarb, and baking powder thrice.
  • In the big mixer jar, put butter, sugar and milk and pulse it for 20 seconds.
  • Now add the sift flour to the mixer jar and pulse it for next 30 seconds. Using a Spatula try to reach the corners of the jar and release the dry flour (unmixed) sticking there.
  • Add honey and curd, pulse for 5 seconds.
  • Add essence and color, pulse again for 15 seconds.
  • Add tutty-fruity and mix using spatula. Do not pulse this time.
  • Grease and dust a microwave safe dish with 7" diameter.
  • Pour batter in the dish.
  • Microwave on 60% power for 10 min.
  • Check if the cake is sooked completely by inserting a tooth-pick in the centre of the cake. If the tooth-pick comes out clean, it means cake is done. If not, then microwave for 1 minute more at 60% power. (Time varies from machine to machine)
  • Allow to stand-by for 10 min.
  • Unmold the cake sponge on a wire rack and leave it to cool down completely.
  • Slice the cake sponge horizontally into 2 equal parts.
  • Pour the half the soaking syrup on the bottom layer of the cake sponge.
  • Spread 1 cup cream over it.
  • Pour the remaining soaking syrup on the top layer of cake sponge and place it carefully on the other layer.
  • Spread all the remaining cream on the sides and top of the cake sponge using a spatula.
  • Be creative and use piping bag to decorate your cake with some nice design and at last sprinkle some tutty-fruity to add a pop of colour to the cake.
  • Keep refrigerated till use.

 tutty fruity cake


Friday, September 19, 2014

Paneer Wraps - Low Fat & Healthy Breakfast

Paneer wrap
Paneer Wrap

These wraps are so tempting and irresistible that you would like to add it to your weekly breakfast plan. The plus point here is that the recipe is very easy and quick. You can do most of the preparation a night before.

When I make this recipe, I always prefer to make this sabji- chinese style cabbage stir-fry for the dinner with some extra cabbage so that I can use the leftover sabji for 'paneer wrap' in the break-fast. Dough and Low fat paneer can also be prepared a night before and keep in the refrigerator. So, on a hurried morning I just need to cook the chapati and assemble the wrap.

To keep the fat-content in check, I've use home made low fat paneer. Also I've used whole wheat chapati, unlike the street food where they use oily lachha paranthas to make this wrap. So the overall outcome is a good deal of healthy and yummy break fast.

Makes : 1 Paneer wrap
Preparation Time : 5 min
Cooking Time : 2 min

Things Required :

paneer wrap
things required for paneer wrap

As the above image clearly shows, we'll need
  • 1 tsp tomato ketchup
  • 1/2 tsp chilli sauce
  • 1 tbsp 1 inch long, thin strips of low fat paneer
  • 2 tbsp Chinese style cabbage stir fry
  • 1/2 tsp fresh coriander (finely chopped)
  • Whole wheat dough for 1 chapati
  • Aluminium foil
Procedure -
1. Roll out a chapati using the whole wheat dough and cook on both the sides on a hot griddle/tawa using a cotton handkerchief.

2. Place the cooked chapati on a plate. Spread tomato ketchup and chilli sauce and then put chinese style cabbage stir-fry and fresh coriander across the centre of the chapati. Like this :


3. Over this arrange the low fat paneer slices side by side in a queue.


4. Fold over both the sides and wrap half the roll with aluminium foil.


5. Serve immediately.


Tip : Assemble the wrap just before serving as it may turn soggy becuase of the layer of sauces inside.

Thursday, September 18, 2014

Chinese style Cabbage Stir-fry

chinese style cabbage stir-fry
Add caption
A very quick recipe. Just takes about 7-8 minutes to get cooked and preparation time is as much as you spend in shredding your cabbage. I never opt for cutting the cabbage, rather I prefer to use a slicer to get fine and equal shreds and the job is done in barely 2 minutes.

This sabji can be served as a side dish with whole wheat parathas. I use the left-over sabji to make paneer wraps for a healthy breakfast.

Preparation Time : 2 min
Cooking Time : 2 min
Serves : 2

Ingredients -

Cabbage (shredded) - 4 cups
Oil - 1 tsp
Soy Sauce - 1 tsp
Tomato Ketchup - 1 tbsp
Chilli Sauce/red chilli powder/green chilies (finely chopped)- to taste
Vinegar - 1 tsp
Salt to taste
Fresh Coriander (finely chopped) - 1 tbsp (for the garnish)

Procedure -

  1. Heat oil in a non-stick deep pan.
  2. Add cabbage and salt. Saute for 5 min on medium-high flame. Keep stirring continuously.
  3. Add the rest of the ingredients. Mix and Saute for 2 minutes more.
  4. Taste the veggie and adjust the seasoning.
  5. Garnish with coriander and serve.
Tip - The end result should not be completely cooked cabbage, rather it should be crunchy (semi-cooked) and spicy.

3 Minute Microwave Chocolate Mug Cake - whole wheat, eggless & butterless

Whatelse can u ask for!!

A cake that can be :
- whipped up in seconds,
- cooked in 2 minutes,
- uses whole wheat flour (atta)
- eggless
- butterless

Such a dish is treat in itself and I am happy to innovate such a recipe that is tasty, healthy and chocolaty.

Preparation time : 1 min
Cooking time : 3 min

Ingredients :

Wheat Flour ( atta) - 2 tbsp
All-purpose Flour (maida) - 2 tbsp
Powder Sugar - 3 tbsp
Coco Powder - 1 tbsp
Drinking Chocolate - 1 tbsp
Hershey's Chocolate syrup - 1 tbsp (optional)
Baking Soda - 1/4 tsp
Oil - 4 tsp
Milk - 6 tbsp
Walnuts / choco chips - 1 tbsp (optional)

Procedure :
  1. Take a microwave safe mug(12 oz). Put all the dry ingredients first and then the liquid ones. Mix everything well using a spoon. Make sure you dig the spoon to the bottom and corners of the mug.
  2. Mug should not be filled more than half the capacity. Otherwise, when the cake will rise while cooking, it will spillover.
  3. Place the mug with batter in the centre of the microwave.
  4. Microwave high for 3 minutes. Time varies for each microwave. If you find the centre of the cake wet, microwave it more for another 30 seconds. To check if the cake is done, insert a tooth-pick into it, if it comes out clean, cake is cooked.
Cake is ready!!

Suggested garnish : Chocolate sauce/ hershey's chocolate syrup/ whipped cream


Paneer Lababdar - Low calorie Sabji

This beautiful bright yellow paneer sabji gonna be your new favourite. Those succulent paneer pieces dipped in milky gravy will definately satiate your taste buds and pamper your senses.

I saw this recipe on the website of my recipe guru - Mrs. Tarla Dalal. When I first made this recipe, I tried a shortcut by using the paste of onion instead of chopped onions in step 1 so that i don't need to cool down the gravy and then blend it, but the taste was not that great. Next time i followed the original recipe procedure and churned the gravy after cooking onions and tomatoes and friends, speaking the truth, the taste of this gravy is really worth the effort!!

I've written the recipe the way i made it. I made slight changes and customized the seasoning and gravy to my own taste. For the source recipe, you can click here. To see my recipe just go on reading..

Ingredients :

Low Fat Paneer Cubes from 1 litre low-fat milk (approx 200gm)
Oil - 1 tsp
Cumin Seeds (Jeera) - 1/2 tsp
Coriander powder (dhaniya powder) - 1 tsp
Onion (finely chopped) - 2
Kasoori methi - 1/2 tsp
Corriander powder - 1/2 tsp
Red chili powder - 1/2 tsp
Tomatoes (pureed) - 3
Turmeric powder (haldi) - 1/4 tsp
Corn flour - 1/2 tsp
Low Fat Milk (cold) - 1 cup
Sugar - 1 tsp
Salt to taste

Procedure :

  1. Heat oil in a non-stick pan. Crackle the cumin seeds, then add coriander powder, red chili powder, kasoori methi and chopped onions.
  2. Saute the onions till light brown in colour. 
  3. Add pureed tomatoes, turmeric powder. Cook on medium flame for 4-5 minutes.
  4. Take your pan off the fire, allow it to cool slightly and transfer the masala mixture to the mixer jar.
  5. Add 2 tbsp water and blend in the mixer to make a fine paste.
  6. Transfer this paste back to your non-stick pan.
  7. Add cornflour to the cold milk and mix properly.
  8. Add this cornflour-milk mixture to the non-stick pan.
  9. Mix well and cook on sim(lowest) flame for 7-8 min.
  10. Add paneer cubes, salt and sugar.
  11. Cook on sim(low) flame for another 3-4 min.
  12. Paneer Lababdar is ready. 
Suggested Garnish : Freshly chopped coriander leaves.
Best Accompaniment : Whole Wheat Chapati / Paratha

Wednesday, September 17, 2014

Bread Idli - Low calorie breakfast/snacks

bread idli
bread idli
This recipe can be prepared for break-fast or tea-time snacks. These idlis can also be served as a starter for the party.

This weekend when I went to my mum’s place, she made this delicious breakfast- bread idli for us. She makes this recipe like no-one-else-can in the universe. Her bread-idli’s have crispy bottom layer and very soft upper layer.

This recipe has four parts.
 1.     Cutting the bread roundels.
 2.       Preaparing the potato mixture.
 3.       Preparing the yoghurt mixture.
 4.       Assembling.


bread idli
bread idli


Serves – 2
Makes 6 bread idlis.

1.Ingredients  for cutting the bread roundels -
·         White bread - 6
·         Circular cookie cutter / any round bowl or lid that can be used to cut the bread in circle shape.

       Procedure –
·         Cut each bread into circular discs by pressing your cookie cutter/bowl/lid over the bread.
·         Do not throw away the remaining parts, dry them and crush to get bread-crumbs. Store the bread crumbs in air-tight container.

2.Ingredients  for Potato mixture-
·         Potato(boiled, peeed and mashed) – 4
·         Salt to taste
·         Red chilli powder- ½ tsp
·         Coriander powder (dhaniya powder) – 1/2 tsp
·         Aniseed powder (saunf powder) – ½ tsp
·         Chat masala – 1 tsp

Procedure –
·         Mix everything very nicely. Taste and adjust the seasoning.
·         Divide the mixture into six equal portions.

3. Ingredients  for Yoghurt mixture-
·         Yughirt – ½ cup
·         Oil – 1 tsp
·         Mustard Seeds (Rai) – ½ tsp
·         Asafoetida – a pinch

 Procedure –
·         Whisk/blend the yoghurt to remove any lumps.
·     Prepare the tempering by heating the oil in a small fry pan. Crackle the mustard seeds and asafetida. Remove from fire. Keep it for 10 min (to cool down). Pour this tempering over the yoghurt and stir to mix everything.
·         If you pour the tempering immediately after crackling, yoghurt will get curdled. Hot tempering will ruin the yoghurt.

Ingredients for assembling the bread idli -
·         Oil – 1 tsp
·         Tomato ketch-up in squeeze bottle
·         Curry leaves – 12 (optional)
·         Griddle
·         4 stainless steel bowls to cover and cook the bread-idli

Procedure to assemble the bread idli
1.       Spread a thin layer of potato mixture evenly on one side of the bread roundels.
2.     Heat a non-stick tawa/griddle. Drizzle a few drops of oil on it and place the breads with potato mixture side facing downwards.
3.       Simmer the flame.
4.       Spread the 1 and ½ tsp of yoghurt-mixture on the bread roundels.
5.       Cover each bread-idli with a stain-less steel bowl and let it cook for 5 minutes on sim flame.
6.    After 5 minutes, remove the bowls from the griddle very carefully (using a kitchen towel/ mittens). Bowls get very hot. 
     7.    By now, you will observe the breads have soaked the yoghurt entirely and the bottom layer has become crisp.
      8.    Garnish them with tomato ketch-up and curry leaves.
9.     Serve immediately.

Below are some pics that i clicked while my mom was preparing this recipe.


That's it!!

Monday, September 15, 2014

Pav Pizza Exotica

pav pizza exotica
pav pizza exotica

A great recipe for your cocktail party menu or can also be served as a party starter to your guests.

This is a very easy recipe, even beginners can give it a try. Most of the ingredients of this recipe are generally available at home.

I made pav-bhaji one day and was left with many pav breads, so the idea sprung to my mind, why not prepare them like mini pizzas that can be relished at tea-time or with a soup. These pav pizzas can also be served as a side dish to pastas or noodles.

You can even use hot dog buns or the burger buns in place of pav breads.


Serves - 2
Makes - 6 pav pizza exotica

Ingredients :

Pav Bread - 2
Tomato (finely chopped) - 1 tbsp
Onion (finely chopped) - 1 tbsp
Capsicum (finely chopped) - 1 tbsp
Oil to brush the slices
Cheese grated - 4 tbsp

Ingredients for the seasoned butter -

Butter (softened) - 3 tsp
Salt - to taste
Pepper - 1/4 tsp
Mix dried herbs (oregano, thyme, parsley etc) - 1/2 tsp

Procedure - 
  1. Cut pav into three thick slices horizontally.
  2. Mix all the seasonings into the butter.
  3. Brush a little oil on the bottom and sides of all the pav slices and the seasoned butter on the top.
  4. Bake these slices in a preheated oven at 200˚(400˚F) C for 5-7 minutes.
  5. Take the slices out of the oven and put a little amount of tomato, onion and capsicum on the toasted pav slices.
  6. Spread grated cheese over the topping and bake in a preheated oven at 200˚C (400˚F) for 10 minutes, till cheese melts and corners of the pav slice turn red and crispy.
  7. Serve immediately with chili flakes, Italian seasonings and tomato ketch-up.

Best Accompaniments :  Chilled cold-drink or lemonade, pastas, noodles