Showing posts with label desserts. Show all posts

Friday, May 1, 2020

Chocolate cake using milk powder

My sister used to make this cake and I was always fond of it!

Ingredients

malai 1/2 cup
sugar 3/4 cup
milk 1/2 cup
maida 1 cup
milk powder 1/2 cup
baking soda 1/2 teaspoon
baking powder 1/4 teaspoon
cocoa powder 2 teaspoon

Black Forest Cake

Sonal didi gave me this recipe. Having this cake on diwali night at her place was always a sheer delight.

Maida - 210 gm (2.5 measuring cup)
Drinking Chocolate - 3 tsp
Milkmaid - 1 tin
soft butter - 130 gm
Soda bottle - 200 ml
Baking powder - 1.25 tsp
Soda bicarb - 1 tsp


Apple Malpua

Inspired from Chef Neeta Mehta

1 large apple - Peeled, cored and cut into thin rounds (approx 10 rounds)
2 tbsp maida
2 tbsp atta
1/4 cup and 1-2 tbsp milk
nutmeg powder
cinnamon powder
1/2 cup sugar
Oil for deep frying

Garnish - Nutmeg and Cinnamon powder
                2-3 almonds sliced
                a little chilled rabri for topping.


  • Make a thick batter of atta, maida and milk. 
  • Heat oil. Dip apple rounds in batter and fry on high flame to crisp golden brown color.
  • Make Sugar syrup by boiling 1/2 cup sugar with slightly less than 1/2 cup water. After sugar dissolves, keep on low flame for 2-3 min only. Remove syrup fron heat. Dont make syrup very thick.
  • Dip fried apple rounds in sugar syrup one by one. Leave in the syrup for a few seconds. Place in a serving plate.
  • To serve, top malpuas with some chilled rabdi or serve warm malpuas sprinkled with nutmeg or cinnamon powder, along with cold rabri or ice-cream served seperately.
  • Garnish with blanched almonds.

Biscuit Pudding


Step 1: Vanilla custard
1.25 cup milk + 2 serving spoon sugar. Boil.
Mix 2 serving spoon custard powder in half cup cold milk.
Let it cool.

Step 2 : Strawberry custard.
Procedure same as above.

Step 3: Mix 1.5 tsp coffee powder in a cup of water.

Take a square dish. Spread a layer of parle-g biscuits dipped in the coffee water in the bottom of dish. then create a layer of strawberry custard over it. Again create a layer of parle-g biscuits dipped in the coffee water and the cover it with vanilla custard. Put int in the fridge. Serve Chilled.
Gatnish with Tutty-fruity.

Wednesday, April 29, 2020

Basic sponge cake

Ingredients:

1 cup maida
1/2 tsp baking soda
1/4 tsp baking powder
3/4 cup powder sugar
1/2 cup malai
1/2 to 3/4 cup warm milk

Microwave on 50% power for 10 min, increase the time until cake is totally done.

Makhan Bade


 सामग्री 

गेहू का आटा  ----एक कटोरी 
मलाई ----  आधा कटोरी 
घी -----एक  चम्मच  छोटी 
पानी---   डेढ कटोरी लगभगश
शक्कर व पानी चासनी के लिये 
चाश्नी ---- 1 तार की 


विधि 

आप मैदा जैसा  महीन  गेहू का आटा लीजिये  आटे को छान लीजिये 
फिर उसमें   आधा कटोरी मलाई  व  एक छोटी चम्मच   घी  लीजिये  व पानी डालकर मिक्स करिये   हल्के हाथो से 
उसमे गाठे नही रहना चाहिये 
व 10 मिन्ट  तक मिश्रण को  रखिये 
मिश्रण बडे के घोल की तरह होना चाहिये 
🏻अब एक फ्लैट कडाई लीजिये , उसमे  घी डालिये 
घी बहुत ज्यादा नही डालना 
कम घी मे ही तलने है  वरना  फट जायेगे  यदि ज्यादा घी मे तलेगे तो 

🏻दूसरी तरफ  पानी व शक्कर की चाशनी बना लीजिये   एक तार  से कम की की चाश्नी बनाना है  दो कटोरी चीनी मे डेढ कटोरी पानी डालकर पतली चाशनी बना लीजिये 
🏻 कडाई गरम होने पर ,  फिर इस  आटे वाले मिश्रण    को चारो अगुंलियो   पर लेकर   , गोलगोल बनाकर 
घी में मन्द आँच में ये बडे   की तरह डालिये   व तलिये 
 जब एक तरफ से तल जाये तब साईड बदलकर दूसरी तरफ  से भी तल लीजिये 
व फिर  एक प्लेट पर निकाल लीजिये 
फिर चाश्नी में डालिये 
आपका मक्खन बड़े तैयार है 
गुलाब जामुन जैसे स्वादिष्ट लगते है

Wednesday, April 11, 2018

Microwave Chocolate cake (whole wheat)

microwave chocolate cake

Friends, I am so excited to share this recipe with you. It tastes like heaven.. so yummylicious, chocolicious and delicious!!!

Its soft texture, mouth-melting chocolaty taste makes you craving for more and more.
Wonderful thing about this cake is it consists of all the healthy ingredients- atta, chocolate, yoghurt and excludes my dislikes i.e, maida, high quantity of butter, milkmaid etc. So this cake is absolutely guilt-free.. i am in a state of bliss!!

I love making and baking cakes, but since long I started kinda avoiding them because of maida and butter/milkmaid that they involve. Then came this recipe which changed the whole concept of cake(maida and all..) for me. I want to innovate more such recipe that are healthy, easy on our metabolism and absolutely delicious!!


Serves - 8  wedges
Preparation time - 7 minutes
Cooking time - 14 min

Ingredients :

Wheat flour (gehun ka atta) - 1-3/4 cup
Chocolate chips - 1 cup (or 115 gm cooking chocolate)
Sugar - 1-1/4 cup
Milk - 1 cup
Baking powder - 1/4 tsp
Soda-bi-carb - 3/4 tsp
Oill - 1/4 cup
Yoghrt - 1/2 cup
Vanilla essence - 1/2 tsp

Procedure - 


  1. Take a big microwave safe bowl. Add Chocolate chips, milk and sugar. Microwave high for 2 minutes, stirring the mixture once in between. Stir for a while so that everything get dissolved.
  2. Add oil to the above mixture.
  3. Sieve atta, baking powder and soda-bi-carb.
  4. Add it to the chocolate-milk mixture little by little. Keep stirring to avoid any lumps. (Tip - use whisk to avoid the hassles of lump)
  5. Add yoghurt and vanilla essence.
  6. Batter should be thick and should have a dropping consistency.
  7. Grease and dust an 8" round microwave safe dish. 
  8. Pour the batter. Tap the dish to settle the batter.
  9. Microwave on 50% power (450W) for 14 min.
  10. Top layer should not appear wet. If so, microwave more for a minute or two (time varies from machine to machine).
  11. To check if the cake is done, insert a clean tooth-pick deep down the bottom of the cake. When you pull it back, it should come out clean. If not, cake needs more cooking/baking.
  12. Stand-by the cake for 10 min. (during stand-by time also, cooking procedure goes on)
  13. With a knife loosen the edges of the cake from the dish.
  14. Invert the dish on a wire rack and tap it forcefully so that cake moves out.
  15. Keep aside to cool down.
Tip - 
  1. Refrigerate the leftover cake in an air-tight container. It remains fresh for 4-5 days.
  2. Reheating a wedge for 10 seconds before serving makes it taste like just-out-of-the-oven everytime you have it.
  3. Drizzle some hershey's chocolate syrup over it for a more chocolaty taste.


Monday, April 9, 2018

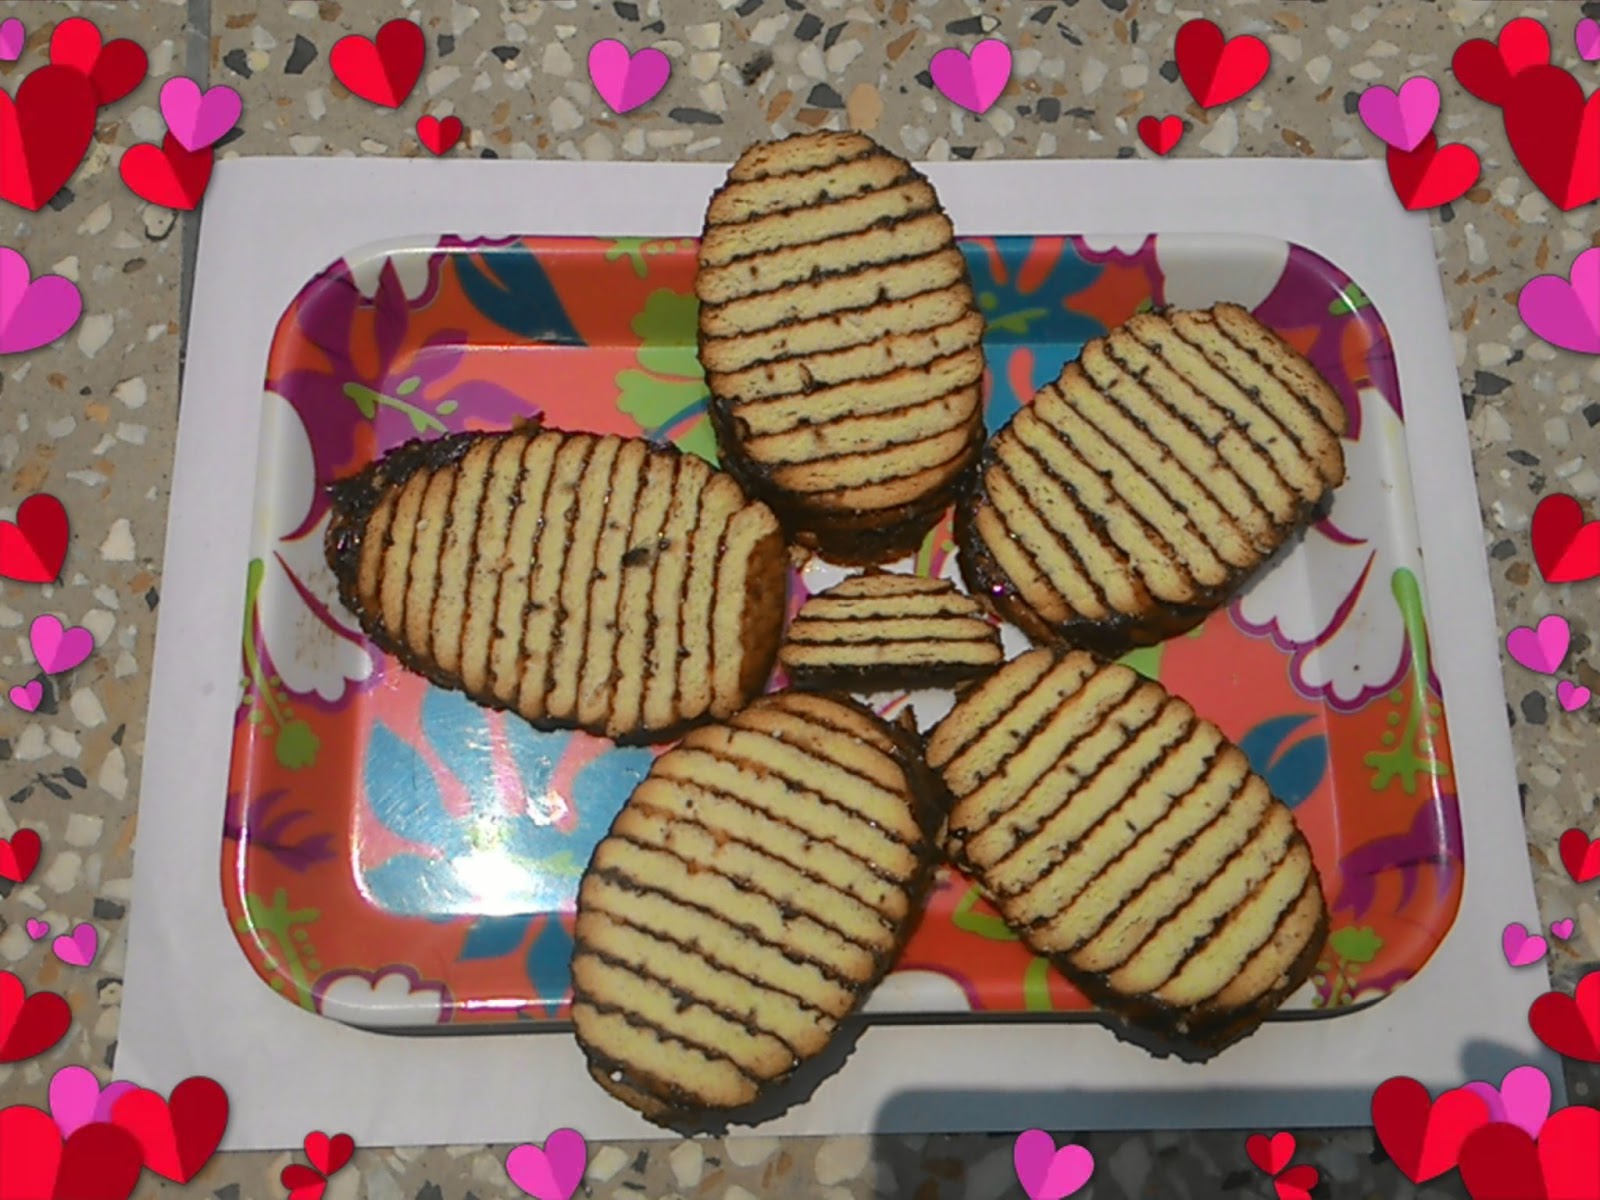
No Bake Chocolate cake (using marie biscuits)

no bake chocolate cake
No bake Chocolate cake


When I tasted it for the first time, I was fascinated by the fact that it has been prepared using marie biscuit. It tastes even better than chocolate cake and is definitely very easy and entertaining to prepare.

I got this recipe from my sister-in-law.. Neha Bhabi Ji. She is a pro, always enthusiast to cook amazingly delicious recipes for us. Its always a party-time to go to her place. At the same time, she's most humble to share all the recipes, tips n tricks with us.

As the title says this recipe doesn't need to be baked instead it requires refrigeration.

Recipe :

Ingredients : 

Semolina - 2 tbsp
Desiccated coconut - 2 tbsp
Cocoa powder - 2 tbsp
Sugar - 2 tbsp
Milk - 1 tea cup (approx 150 ml)

Marie biscuit - 10

Aluminium Foil to wrap

Procedure :


  1. Heat a non-stick pan. Dry roast the semolina till it is golden-brown.
  2. Turn off the flame.
  3. Put desiccated coconut, Cocoa powder, sugar and milk. Mix.
  4. Start the flame and cook while stirring continuously till it becomes like a paste. It should not be too thick, otherwise all the moisture will evaporate and cake will taste dry. We need it to retain some milk because ultimately the biscuits will absorb this moisture and will become soft and cake-like. But at the same time, it should not be runny.
  5. Put off the flame. Let the prepared mixture get cool-down slightly.
  6. Now on a clean surface, place one marie bisuit, spread a layer of the prepared mixture over it, top it with another marie biscuit, again spread a layer of the prepared mixture over it. Go on till you pile up all the biscuits.
  7. Now cover all the sides of the log with the prepared mixture.
  8. Place it horizontally on the aluminium foil, handling the log very carefully or else everything will fall apart.
  9. Wrap it tightly into the aluminium foil from all the sides.
  10. Keep it in the refrigerator overnight or freeze it for two hours.
  11. Unwrap it and cut into diagonal slices (like we cut cucumbers for salad).
  12. Enticing and inviting Chocolate cake is ready to serve :)


Tuesday, May 12, 2015

Strawberry Trifle


Strawberry Trifle

Things required :

1 stem glass
Leftover vanilla sponge cake
Whipped Cream
Fresh Strawberry chunks (hulled and chopped)

Procedure :


1. Cut the sponge into 1 inch cubes and place a few of them at the bottom of the glass.
2. Pipe out a generous amount of whipping cream over it to form a layer.
3. Layer the chunks of fresh strawberry over it.
4. Pipe out whipping cream to make a new layer.
5. Place the cake cubes carefully to make a new layer.
6. Again pipe out whipping cream to form a layer.
7. Lastly place the fresh strawberry chunks to make the top-most layer.
8. Chill it for atleast 2 hours before serving.

Tips : You can use a readymade sponge cake to keep the procedure simpler.

Variation :   Orange Trifle. For the recipe, please click here.


Friday, February 20, 2015

Chocolate Ganache/Truffle Cake

Chocolate Ganache/Truffle Cake

My husband loves chococlate, so for the midnight cake on his bday I decided to do the ganache cake to delight him. He was amazed.  He loved it!

Chocolate Ganache/Truffle Cake

To start with, first prepare the sponge in a heart shape microwave safe dish and set it aside to cool down on a wire rack.


Chocolate Ganache/Truffle Cake


Slice the cake horizontally into 3 layers.

Chocolate Ganache/Truffle Cake

Then I prepared my Ganache using : 1 tetra pack (200 ml) Amul low fat cream, 400 gm cooking chocolate.
Seperate the watery liquid from the cream and use only the thick cream. Cut the cooking chocolate slab into small chunks, put them in the cream and microwave it on 80% power till chocolate melts and yields a smooth shiny paste. This is ganache!

Chocolate Ganache/Truffle Cake


Now pour some soaking syrup on the bottom layer of the sponge and spread one-fourth of the ganache, then carefully place the middle layer, pour some soaking syrup and apply the ganache and then the top layer, pour the soaking syrup and apply ganache on the top and all the sides of the cake.

Chocolate Ganache/Truffle Cake

 Garnish the cake with grated chocolate and sprinklers. 

Chocolate Ganache/Truffle Cake


Tadaa... 

Chocolate Ganache/Truffle Cake

Tip : Microwave the cake wedge just before serving for 10 seconds, enhances the taste and texture many folds.


                         Chocolate Ganache/Truffle Cake

Friday, November 28, 2014

Orange Trifle

orange trifle


Things required :


1 stem glass
Orange Sponge Cake (for the recipe click here)
Whipped Cream
Fresh Orange Segments (peeled and deseeded)

Procedure

1. Cut the sponge into 1 inch cubes and place a few of them at the bottom of the glass.
2. Pipe out a generous amount of whipping cream over it to form a layer.
3. Layer the chunks of fresh orange over it.
4. Pipe out whipping cream to make a new layer.
5. Place the cake cubes carefully to make a new layer.
6. Again pipe out whipping cream to form a layer.
7. Lastly place the orange chunks to make the top-most layer.
8. Chill it for atleast 2 hours before serving.

Tips : You can use a readymade sponge cake to keep the procedure simpler.

Variation :  Strawberry Trifle. For the recipe, click here.


Orange Sponge Cake (Eggless)

Orange Sponge Cake (Eggless)

tastes best when chilled!!

Preparation time : 15 min
Baking time : 30-45 min
Serves - 10 people

Ingredients :

Maida - 2 cups
Condensed Milk - 1 tin
Mirinda/Fanta Cold drink - 180 ml
Butter (white) - 6 tbsp (or 90 gm)
Soda-bi-carb - 1/2 tsp
Baking Powder - 1 tsp

Procedure :

1. Whisk condensed milk and butter together.
2. Add soda-bi-carb and baking powder to maida and sieve thrice.
3. Start with adding 2 tbsp of maida mixture into the condensed milk-butter mixture. Mix it thoroughly. Again add 2 tbsp of maida mixture. Mix. Keep on repeating the procedure till everything is completely mixed. When the batter gets thick while mixing, add cold drink too.
5. Pour the batter in a greased and dusted baking tin.
6. Bake it in a preheated oven for 35 min at 180 degree.
7. Check the cake by inserting a tooth-pick in the centre of the cake. If it comes out clean, that means cake is done, If not, bake it for 10 min more.

Serving Suggestion : Top it with whipped cream and fresh orange segments (peeled and deseeded)

Variation : For Chocolate Cake - Add 1 tbsp of cocoa powder to the maida mixture in step 2 and instead of mirinda/fanta use pepsi/coke.


Thursday, October 9, 2014

Lauki Ka Halwa (Low fat)

Lauki Ka Halwa (Low fat)

Made up of bottle-gourd and milk, this dessert is a traditional dish of North India. Many people also call it 'Ghiya ki Lauz' or 'Lauki ki lauz'.
It is very easy to prepare, even beginners can make it with perfection, though cooking time is a bit long.
Lauki ki barfi is also prepared the same way, the only difference is that the final product of barfi is drier than halwa. I find halwa tastier than barfi.. may be because of its juicy, wet texture.
This dessert can be served warm or cold, both ways it tastes ultimately delicious!!
Tip -  If anyone in your family doesnt like bottlegourd, then instead of green colour, put red colour and tell them its gajar ka halwa.. no-one will get to know 

Lauki Ka Halwa (Low fat)


Preparation time - 15 min
Cooking time - 45 min
Makes - 6 servings

Ingredients - 

Bottlegourd (Lauki/Doodhi) - 500 gm
Toned Milk - 1 Litre
Sugar - 1 cup
Cardamom Powder - 1/2 tsp
Green Colour - 5-6 drops

Procedure -

  1. Peel and grate bottlegourd.
  2. In a deep, heavy bottom pan, heat milk. Bring it to boil. Lower the flame. Let the milk reduce for 10 min.
  3. Add grated bottle gourd and cardamom powder.
  4. Cook till the mixture gets thick, stirring occasionally. Make sure your spatula reaches the bottom of the pan while stirring, otherwise the food content may stick to the bottom and get butrnt, spoiling the whole recipe.
  5. Add sugar and green colour, mix thoroghly.
  6. Cook till all the liquid evaporates.
  7. Serve hot or cold.
  8. Refrigerate when it has cooled down completely.
Tip - 
  1. Garnish with dry-fruits or nuts like raisins, almonds and cashew nuts.
  2. If making for kids, use full-fat milk.
  3. Rose water can also be used as a flavouring agent instead of cardamom. Add it in the last.


Thursday, September 18, 2014

3 Minute Microwave Chocolate Mug Cake - whole wheat, eggless & butterless

Whatelse can u ask for!!

A cake that can be :
- whipped up in seconds,
- cooked in 2 minutes,
- uses whole wheat flour (atta)
- eggless
- butterless

Such a dish is treat in itself and I am happy to innovate such a recipe that is tasty, healthy and chocolaty.

Preparation time : 1 min
Cooking time : 3 min

Ingredients :

Wheat Flour ( atta) - 2 tbsp
All-purpose Flour (maida) - 2 tbsp
Powder Sugar - 3 tbsp
Coco Powder - 1 tbsp
Drinking Chocolate - 1 tbsp
Hershey's Chocolate syrup - 1 tbsp (optional)
Baking Soda - 1/4 tsp
Oil - 4 tsp
Milk - 6 tbsp
Walnuts / choco chips - 1 tbsp (optional)

Procedure :
  1. Take a microwave safe mug(12 oz). Put all the dry ingredients first and then the liquid ones. Mix everything well using a spoon. Make sure you dig the spoon to the bottom and corners of the mug.
  2. Mug should not be filled more than half the capacity. Otherwise, when the cake will rise while cooking, it will spillover.
  3. Place the mug with batter in the centre of the microwave.
  4. Microwave high for 3 minutes. Time varies for each microwave. If you find the centre of the cake wet, microwave it more for another 30 seconds. To check if the cake is done, insert a tooth-pick into it, if it comes out clean, cake is cooked.
Cake is ready!!

Suggested garnish : Chocolate sauce/ hershey's chocolate syrup/ whipped cream


Wednesday, June 11, 2014

Sooji Ka Halwa

Sooji ka halwa reminds me of childhood.. I used to look for raisins hidden in its grainy texture.. As a child, i loved this dessert because my mom put alot of raisins into it and i liked the taste of raisins cooked with the halwa.. those soft centered juicy dry fruits. My mom knew that i love the raisins in halwa.. she use to pick them out of the halwa and gimme alot more to make my sweet-treat totally enjoyable.

Ingredients :

2 table-spoon ghee
1/2 cup semolina
1/2 cup sugar
1/2 tea-spoon cardamom powder
2 cups water
1 tea-spoon raisins
1 tea-spoon almond slivers
1 tea-spoon cashew cut into small pieces
1 table-spoon desiccated coconut

Procedure :
  1. Heat ghee in a pan
  2. Add semolina. Lower down the flame and cook semolina while stirring frequently till it gets golden-brown and you smell the aroma of cooked semolina.
  3. Add water, sugar, cardamom powder and the dry fruits (leaving a few for the garnish). Stir continuously to avoid any lumps. 
  4. On a medium flame, cook till the mixture stops spluttering and the mixture gets thick.
  5. Transfer the halwa in a serving bowl. 
  6. Garnish with desiccated coconut and  chopped dry-fruits.
  7. Can be served warm or chilled.

Friday, January 17, 2014

Gajar ka Halwa/ Carrot Halwa (Low Calorie)


Gajar ka Halwa/ Carrot Halwa (Low Calorie)

As the winters come, I wait for the bright red carrots to hit the supermarkets, so that I can cook my winter-special dessert i.e. gajar ka halwa.

Gajar ka Halwa/ Carrot Halwa (Low Calorie)

Besides its awesome taste, it gives us many health benefits. Carrot halwa is a rich source of vitamin A. With healthy eyes, it gives us anti-aging benefits, glowing skin, healthy teeth and gums.

Gajar ka Halwa/ Carrot Halwa (Low Calorie)


In the recipe mentioned below, I've used toned milk, but for a rich taste and texture you should use full-fat milk and if you want to further enhance the taste of your halwa then you can go on to add a 100gms grated khoya/mawa to it after boiling the milk or you can also add 2 tbsp condensed milk, the same way.

Ingredients : 

Carrots : 1 kg
Milk (toned) : 1 liter
Sugar to taste
Cardamom powder - 1/2 tsp
Dried Cranberries - 1 tsp
Chopped Cashewnuts - 1 tsp
Chopped Pistachios - 1 tsp
Chopped Almonds - 1 tsp
Raisins - 1 tsp
Ghee - 1 tbsp
Coconut (Shredded) - 2 tbsp for the garnish

Procedure :

  1. Wash, peel and grate carrots.
  2. Boil milk in a wide bottom pan.
  3. Add grated carrots and cardamom powder to the boiling milk, give it a boil again and turn the flame medium.
  4. Keep stirring the milk-carrot mixture after regular intervals and make sure it does not stick to the bottom.
  5. After 15-20 min, carrots will be cooked and milk evaporated, add sugar. Mix.
  6. Cook for 2-3 min more so that all the liquid evaporates.
  7. In a seperate pan, heat ghee and saute lightly all the dry fruits except coconut.
  8. Add all the dry fruits to the carrot halwa.
  9. Mix well.
  10. Delicious carrot halwa is ready. Serve warm or cold garnished with shredded coconut.
Tips for the beginners : 
  • Use a Non-stick pan to avoid the risk of milk burning at the bottom of pan.
  • While stirring the carrot-milk mixture make sure that spoon touches the bottom of the pan.
Gajar ka Halwa/ Carrot Halwa (Low Calorie)