Wednesday, April 11, 2018

Microwave Chocolate cake (whole wheat)

microwave chocolate cake

Friends, I am so excited to share this recipe with you. It tastes like heaven.. so yummylicious, chocolicious and delicious!!!

Its soft texture, mouth-melting chocolaty taste makes you craving for more and more.
Wonderful thing about this cake is it consists of all the healthy ingredients- atta, chocolate, yoghurt and excludes my dislikes i.e, maida, high quantity of butter, milkmaid etc. So this cake is absolutely guilt-free.. i am in a state of bliss!!

I love making and baking cakes, but since long I started kinda avoiding them because of maida and butter/milkmaid that they involve. Then came this recipe which changed the whole concept of cake(maida and all..) for me. I want to innovate more such recipe that are healthy, easy on our metabolism and absolutely delicious!!


Serves - 8  wedges
Preparation time - 7 minutes
Cooking time - 14 min

Ingredients :

Wheat flour (gehun ka atta) - 1-3/4 cup
Chocolate chips - 1 cup (or 115 gm cooking chocolate)
Sugar - 1-1/4 cup
Milk - 1 cup
Baking powder - 1/4 tsp
Soda-bi-carb - 3/4 tsp
Oill - 1/4 cup
Yoghrt - 1/2 cup
Vanilla essence - 1/2 tsp

Procedure - 


  1. Take a big microwave safe bowl. Add Chocolate chips, milk and sugar. Microwave high for 2 minutes, stirring the mixture once in between. Stir for a while so that everything get dissolved.
  2. Add oil to the above mixture.
  3. Sieve atta, baking powder and soda-bi-carb.
  4. Add it to the chocolate-milk mixture little by little. Keep stirring to avoid any lumps. (Tip - use whisk to avoid the hassles of lump)
  5. Add yoghurt and vanilla essence.
  6. Batter should be thick and should have a dropping consistency.
  7. Grease and dust an 8" round microwave safe dish. 
  8. Pour the batter. Tap the dish to settle the batter.
  9. Microwave on 50% power (450W) for 14 min.
  10. Top layer should not appear wet. If so, microwave more for a minute or two (time varies from machine to machine).
  11. To check if the cake is done, insert a clean tooth-pick deep down the bottom of the cake. When you pull it back, it should come out clean. If not, cake needs more cooking/baking.
  12. Stand-by the cake for 10 min. (during stand-by time also, cooking procedure goes on)
  13. With a knife loosen the edges of the cake from the dish.
  14. Invert the dish on a wire rack and tap it forcefully so that cake moves out.
  15. Keep aside to cool down.
Tip - 
  1. Refrigerate the leftover cake in an air-tight container. It remains fresh for 4-5 days.
  2. Reheating a wedge for 10 seconds before serving makes it taste like just-out-of-the-oven everytime you have it.
  3. Drizzle some hershey's chocolate syrup over it for a more chocolaty taste.


Monday, April 9, 2018

No Bake Chocolate cake (using marie biscuits)

no bake chocolate cake
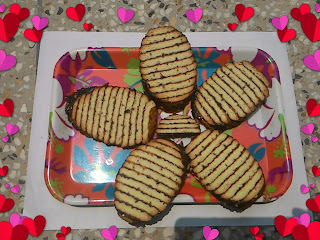
No bake Chocolate cake


When I tasted it for the first time, I was fascinated by the fact that it has been prepared using marie biscuit. It tastes even better than chocolate cake and is definitely very easy and entertaining to prepare.

I got this recipe from my sister-in-law.. Neha Bhabi Ji. She is a pro, always enthusiast to cook amazingly delicious recipes for us. Its always a party-time to go to her place. At the same time, she's most humble to share all the recipes, tips n tricks with us.

As the title says this recipe doesn't need to be baked instead it requires refrigeration.

Recipe :

Ingredients : 

Semolina - 2 tbsp
Desiccated coconut - 2 tbsp
Cocoa powder - 2 tbsp
Sugar - 2 tbsp
Milk - 1 tea cup (approx 150 ml)

Marie biscuit - 10

Aluminium Foil to wrap

Procedure :


  1. Heat a non-stick pan. Dry roast the semolina till it is golden-brown.
  2. Turn off the flame.
  3. Put desiccated coconut, Cocoa powder, sugar and milk. Mix.
  4. Start the flame and cook while stirring continuously till it becomes like a paste. It should not be too thick, otherwise all the moisture will evaporate and cake will taste dry. We need it to retain some milk because ultimately the biscuits will absorb this moisture and will become soft and cake-like. But at the same time, it should not be runny.
  5. Put off the flame. Let the prepared mixture get cool-down slightly.
  6. Now on a clean surface, place one marie bisuit, spread a layer of the prepared mixture over it, top it with another marie biscuit, again spread a layer of the prepared mixture over it. Go on till you pile up all the biscuits.
  7. Now cover all the sides of the log with the prepared mixture.
  8. Place it horizontally on the aluminium foil, handling the log very carefully or else everything will fall apart.
  9. Wrap it tightly into the aluminium foil from all the sides.
  10. Keep it in the refrigerator overnight or freeze it for two hours.
  11. Unwrap it and cut into diagonal slices (like we cut cucumbers for salad).
  12. Enticing and inviting Chocolate cake is ready to serve :)


Friday, April 6, 2018

Pizza Sandwich

This is one of the most trending and easiest recipe!!

Its name itself explains the taste, ingredients and fun attached to it.. when you make this recipe, make sure to prepare a bit extra because people are going to like it alot.

For my daughter, its an all-time favorite tiffin.. nothing can be more pleasing to her :))

Here is the recipe

Makes : 4 Sandwiches

Ingredients :

Onion (finely chopped) - 1
Tomato (deseeded, finely chopped) - 2
Capsicum (deseeded, finely chopped) - 1
Cottage cheese (cut into small cubes) - 1/2 cup
Chilli Flakes - 1/4 tsp
Freshly ground pepper - 1/4 tsp
Mix herbs/ Oregano - 1/2 tsp
Salt  - to taste
Tomato ketchup - 2 tbsp
Grated processed cheese - 1/2 cup
Butter/ ghee - for grilling the sandwiches
8 bread slices

Procedure :

  1. Mix all the veggies, cottage cheese, seasoning and cheese. 
  2. Butter all the slices on one side.
  3. On the other side of 4 bread slices spread tomato ketchup.
  4. Divide the prepared filling (in step 2) in 4 portions and put one portion on each of the bread slice with tomato ketchup.
  5. Close the sandwiches with the remaining bread slices with butter side facing up.
  6. Grill the sandwiches in a sandwich maker till they are golden brown and crisp.
  7. Serve hot with tomato ketchup.
Best Accompaniments : tea/ coffee/ tomato soup.

Tip: 
  • Sandwiches will taste better if you use pizza sauce in place of tomato ketchup.
  • You can add more veggies like boiled sweet corn kernels, olives etc.


Thursday, April 5, 2018

Tomato Soup for winters

Instead of adding cornflour or white sauce to provide thickness to the tomato soup, I always prefer to put in carrots and beetroot in the soup. It not only gives thickness to the soup, but also enhances the taste and nutrition value of the soup.

Ingredients :

Tomatoes (roughly chopped) - 4
Carrots (roughly chopped) - 2
Beetroot - 1/8 piece
Water - 2 cups
Salt to taste
Black pepper - 1/4 tsp
Sugar - 2 tsp


Procedure :

1. Put tomatoes, carrots, beetroot, water and salt in the pressure cooker.
2. Cook for  1 whistle on high flame then reduce the flame and cook for 5 min more.
3. Open the lid of the pressure cooker. Blend to make a fine paste.
4. Sieve the blended liquid in a deep pan to seperate all the unchurned peels and particles.
5. Add sugar and black pepper to the soup. Boil
6. Serve piping hot to warm  up your cold winter evenings! 

Vegetable Mayo sandwich

My daughter always gets excited after watching catchy commercial ads of different eatables and then persuades me to prepare the same thing for her..  pleasure is all mine :)

This time she wanted sandwicheto (= mayo sandwich) that she has watched in commercial ad of funfoods by Dr. Oetker where Sonali Bendre Behl prepares vegetable sandwich using mayonnaise from the above mentioned brand. I must say that the jingle  "mamamamama mayo.. sandwich ban gaya sandwicheto" is very catchy and lingering.

So, I recreated the recipe for her, my whole family liked it alot. Since then, I've prepared it many times and it has always been liked by all.

Here, I've used white bread slices because they are much softer then brown bread. They have much better flavour and odour. But if you are accustomed to brown bread, definitely you can go for it.

Here goes the recipe :

Makes - 1 Sandwich

Ingredients:

Bread slice - 3 ( for 1 sandwich)
Lettuce
Onion rings
Cucumber rings
Tomato rings
Capsicum rings
Mayonnaise - 2 tbsp
Mix herbs/ oregano - 1/4 tsp
Chilli flakes - a pinch
Freshly ground pepper - a pinch
Finely chopped fresh coriander - 1/2 tsp
Green chutney - 1 tbsp

Procedure :
  1. Mix mayonnaise, herbs, chilli flakes, pepper and coriander to prepare the spread.
  2. Remove edges of bread slices.
  3. Apply the prepared spread on two bread slices and green chutney on the third slice.
  4. On a mayo bread slice, place lettuce, onion  rings and capsicum rings.
  5. Cover it with another mayo slice facing upwards.
  6. Place tomato rings and cucumber rings over it.
  7. Close the sandwich with chutney slice.
  8.  Cut it into two halves and serve.
Note :
  •  All the rings has to be thinly sliced. 
  • If preparing for kids you can add a cheese slice too.


Disclamer: This recipe in no way promotes the mentioned brand/ product. 

Wednesday, April 4, 2018

How to use onion for salads

Onions taste great when added properly to salads but sometimes their strong smell and pungent flavors ruin the whole dish, so its important to treat them properly before adding them raw to any dish.

What to do :

Peel and chop onions in the desired manner and then dip in a bowl full of ice-cold water for 10 minutes. This process will take away the pungency of onions while leaving it crunchy as it is supposed to be for the salads.

One of my favorite salad is broccoli-cucumber-onion salad. Guys, I highly recommend this recipe to everyone. Not only it tastes great but also it is highly nutritious and extremely rich in anti-oxidents.